Inspección preoperacional del camión, paso a paso.
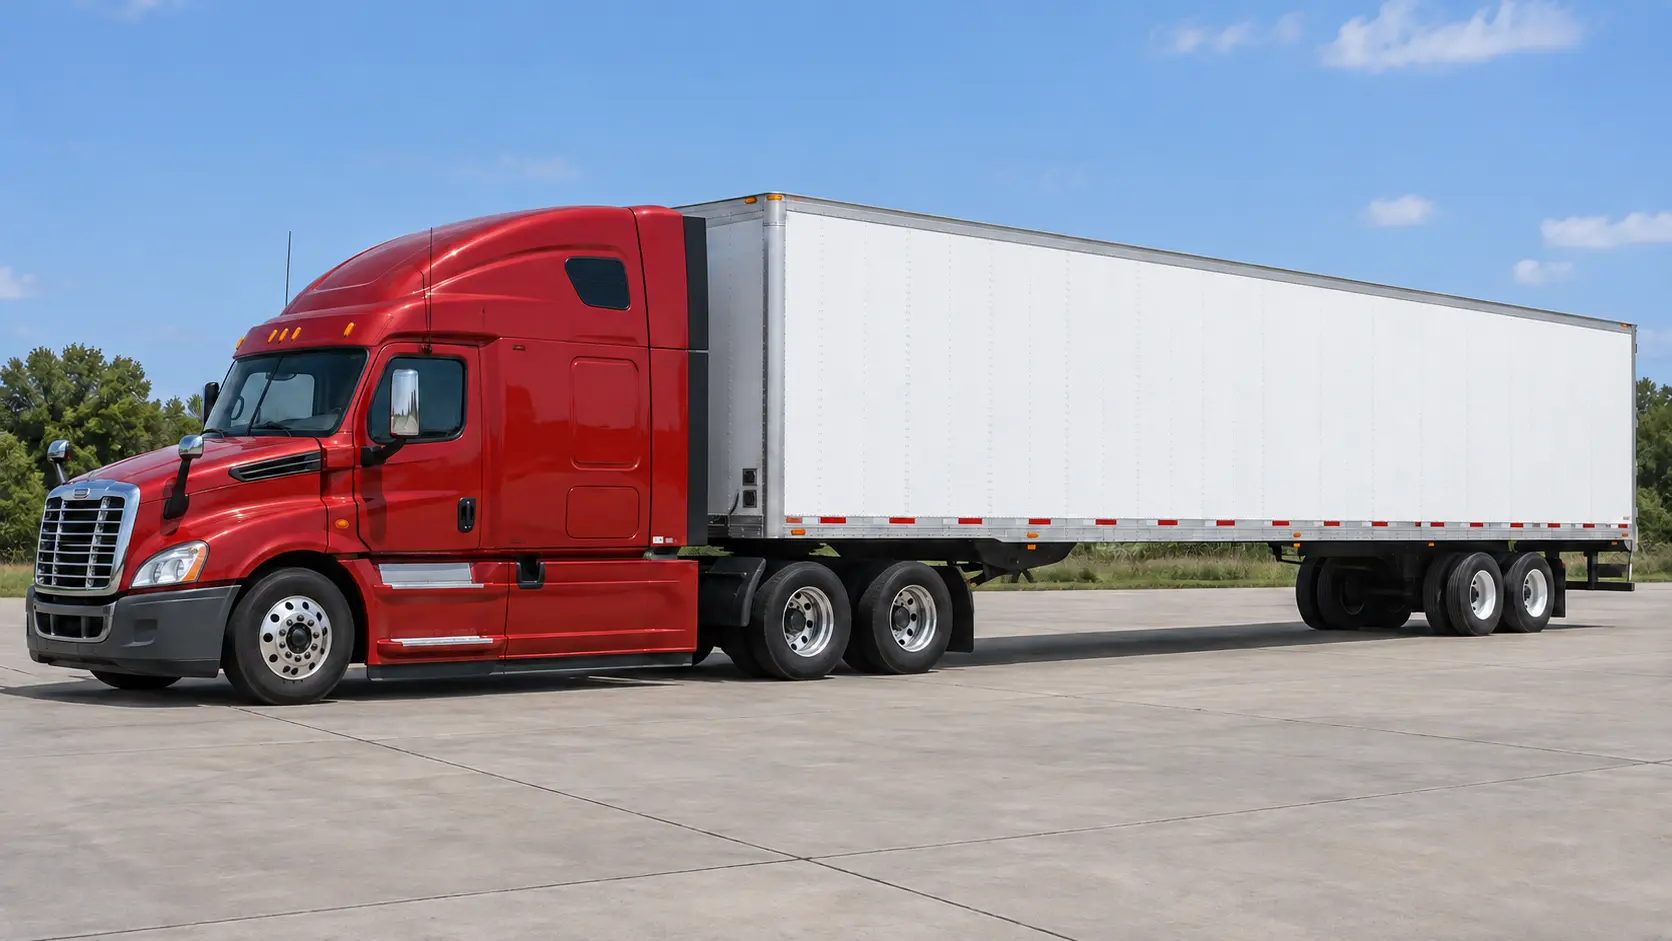
Follow a consistent 12-step path around a typical Class A tractor-trailer. Every step uses a distinct visual from one coordinated photorealistic training series, together with the terms drivers hear at work and the defects that require attention.
Sigue una ruta constante de 12 pasos alrededor de un tractocamión Clase A típico. Cada paso usa una imagen diferente de una misma serie fotorrealista de capacitación, junto con los términos que escucharás en el trabajo y los defectos que requieren atención.
Personal practice checklistLista personal de práctica0 of 12 steps reviewed
Checks are stored only in this browser for personal practice. They are not sent to Mercury, do not prove an inspection occurred, and do not count as course completion.
Las marcas se guardan solamente en este navegador para práctica personal. No se envían a Mercury, no prueban que se realizó una inspección y no cuentan como finalización de un curso.
01
Before touching the vehicleAntes de tocar el vehículo
Park, secure, and review the last report
Estaciona, asegura y revisa el reporte anterior
Secure the combination first: firm level surface, parking brakes applied, wheel chock when required, and the previous DVIR reviewed.Primero asegura la combinación: superficie firme y nivelada, frenos de estacionamiento aplicados, calza cuando se requiera y DVIR anterior revisado.
Check in this order
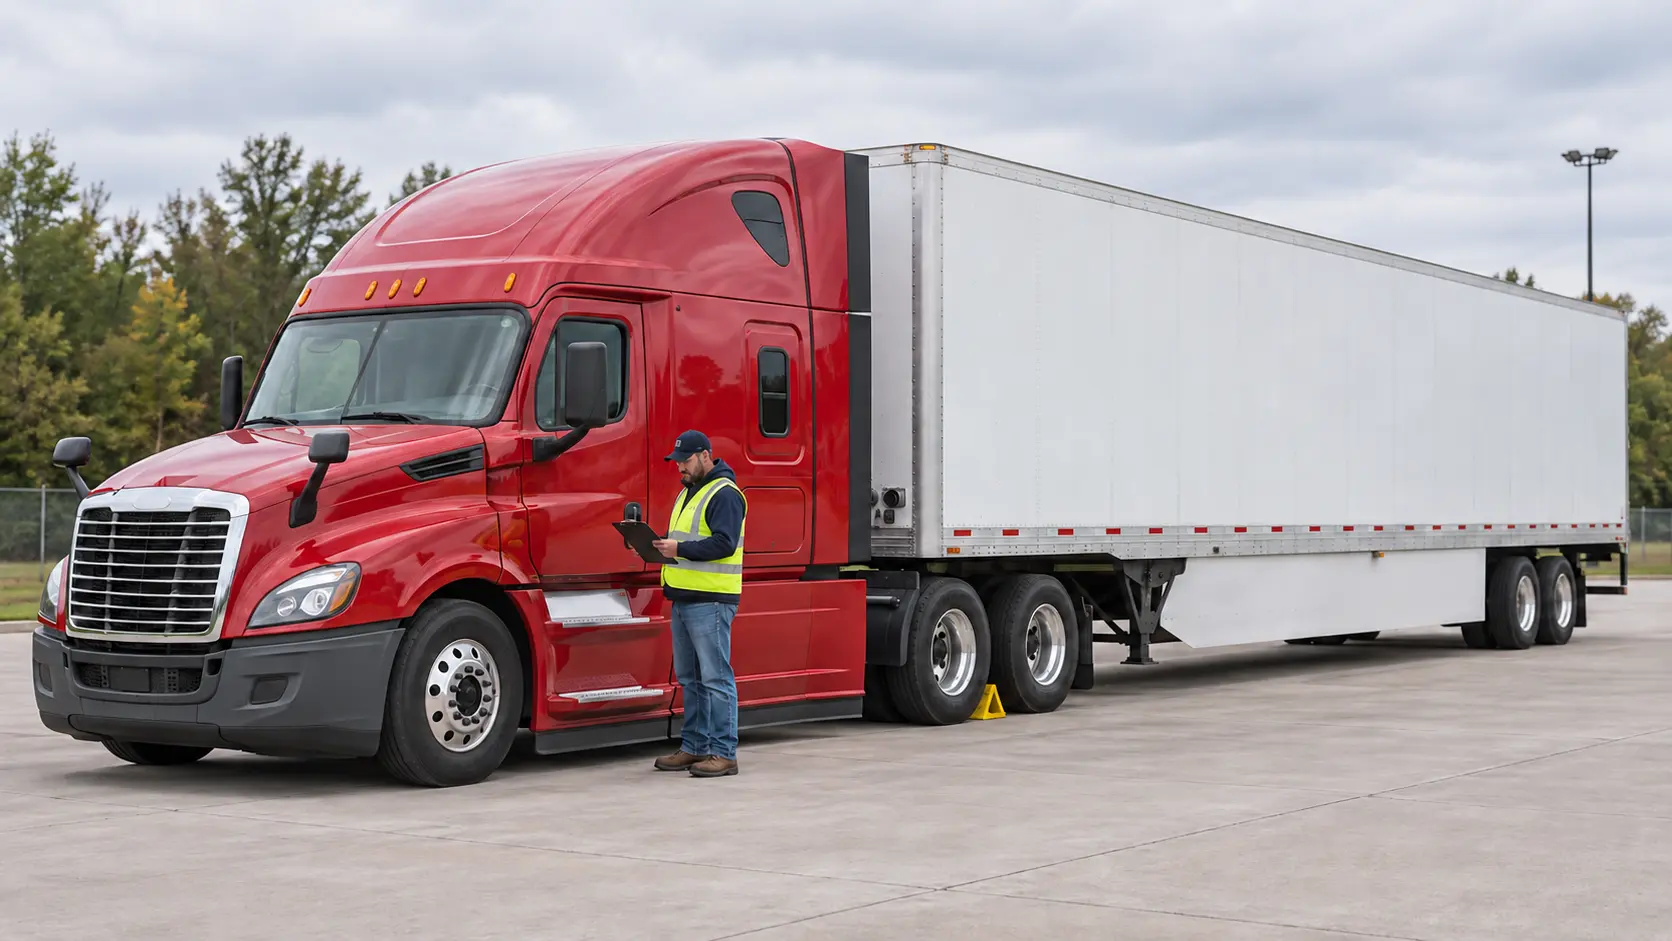
Park on a firm, level surface away from moving traffic whenever possible.
Set the parking brakes, place the transmission in neutral, shut down, keep the key controlled, and use wheel chocks when the vehicle or procedure requires them.
Review the last DVIR. Confirm recorded safety defects were repaired or formally determined not to require repair.
Know the unit numbers, trailer number, load type, height, weight, placards, permits, and route restrictions that apply.
Stop: Do not begin under-hood or coupling work if the vehicle can roll, the area is unsafe, or a prior safety defect is unresolved.
Revisa en este orden
Estaciona sobre una superficie firme y nivelada, lejos del tráfico cuando sea posible.
Aplica los parking brakes, coloca la transmisión en neutral, apaga el motor, controla la llave y usa calzas cuando el vehículo o el procedimiento lo requiera.
Revisa el último DVIR. Confirma que los defectos de seguridad fueron reparados o que se determinó formalmente que no requerían reparación.
Conoce los números del tractor y remolque, tipo de carga, altura, peso, rótulos, permisos y restricciones de ruta.
Detente: No abras el compartimiento del motor ni trabajes en el acoplamiento si el vehículo puede moverse, el lugar no es seguro o existe un defecto sin resolver.
02
Approach inspectionInspección de aproximación
Look at the whole combination before getting close
Observa toda la combinación antes de acercarte
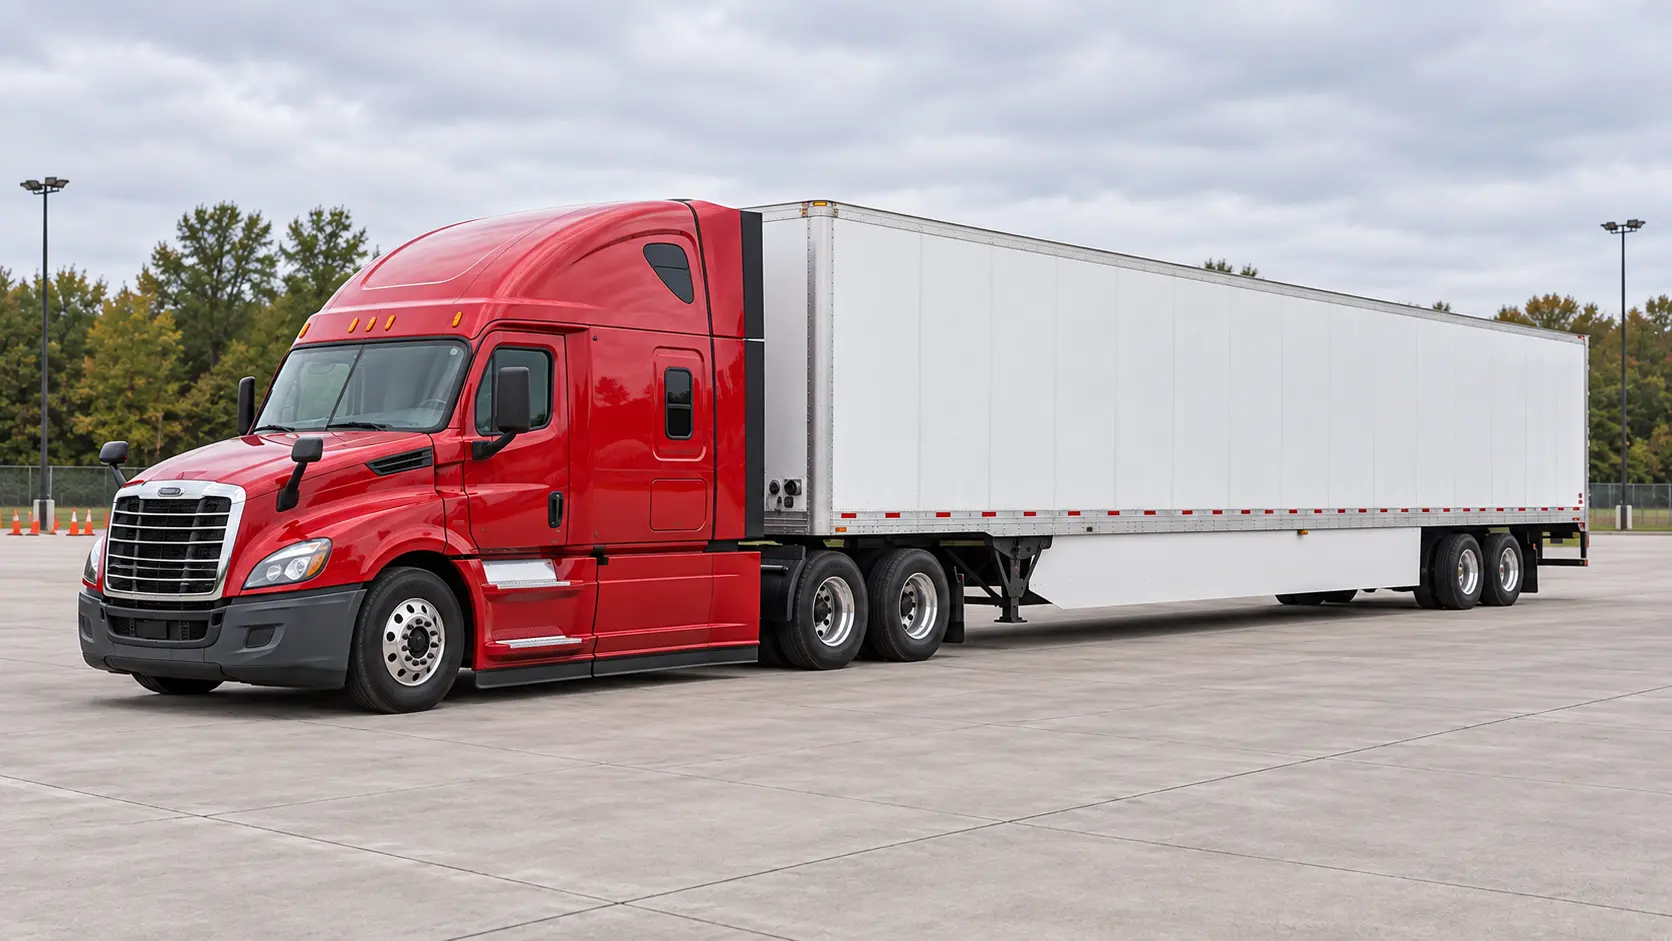
Begin at the visible tractor front, then scan the entire combination toward the trailer rear for lean, damage, hazards, and fresh leaks.Comienza en el frente visible del tractor y observa toda la combinación hacia la parte trasera buscando inclinación, daños, peligros y fugas.
Start at the front, then move toward the rear
Look for the tractor or trailer leaning, sitting low, or showing a shifted load.
Check for fresh oil, coolant, fuel, or other fluid beneath the vehicle. Water from air-conditioning condensation may be normal; identify the source instead of guessing.
Look for body damage, loose panels, open compartments, hanging hoses or wires, flat tires, broken glass, and objects around the vehicle.
Check overhead and side clearance before opening the hood or moving.
Method: Walk the same direction every day. A consistent pattern prevents skipped areas.
Comienza al frente y avanza hacia la parte trasera
Busca si el tractor o el remolque está inclinado, demasiado bajo o muestra una carga desplazada.
Busca aceite, refrigerante, combustible u otro líquido fresco debajo. El agua del aire acondicionado puede ser normal; identifica el origen en vez de adivinar.
Busca daños, paneles sueltos, compartimientos abiertos, mangueras o cables colgantes, llantas desinfladas, vidrios rotos y objetos alrededor.
Comprueba el espacio superior y lateral antes de abrir el capó o mover el vehículo.
Método: Camina siempre en la misma dirección. Una secuencia constante evita olvidar áreas.
03
Engine compartmentCompartimiento del motor
Check fluids, belts, hoses, wiring, and leaks
Revisa fluidos, correas, mangueras, cables y fugas
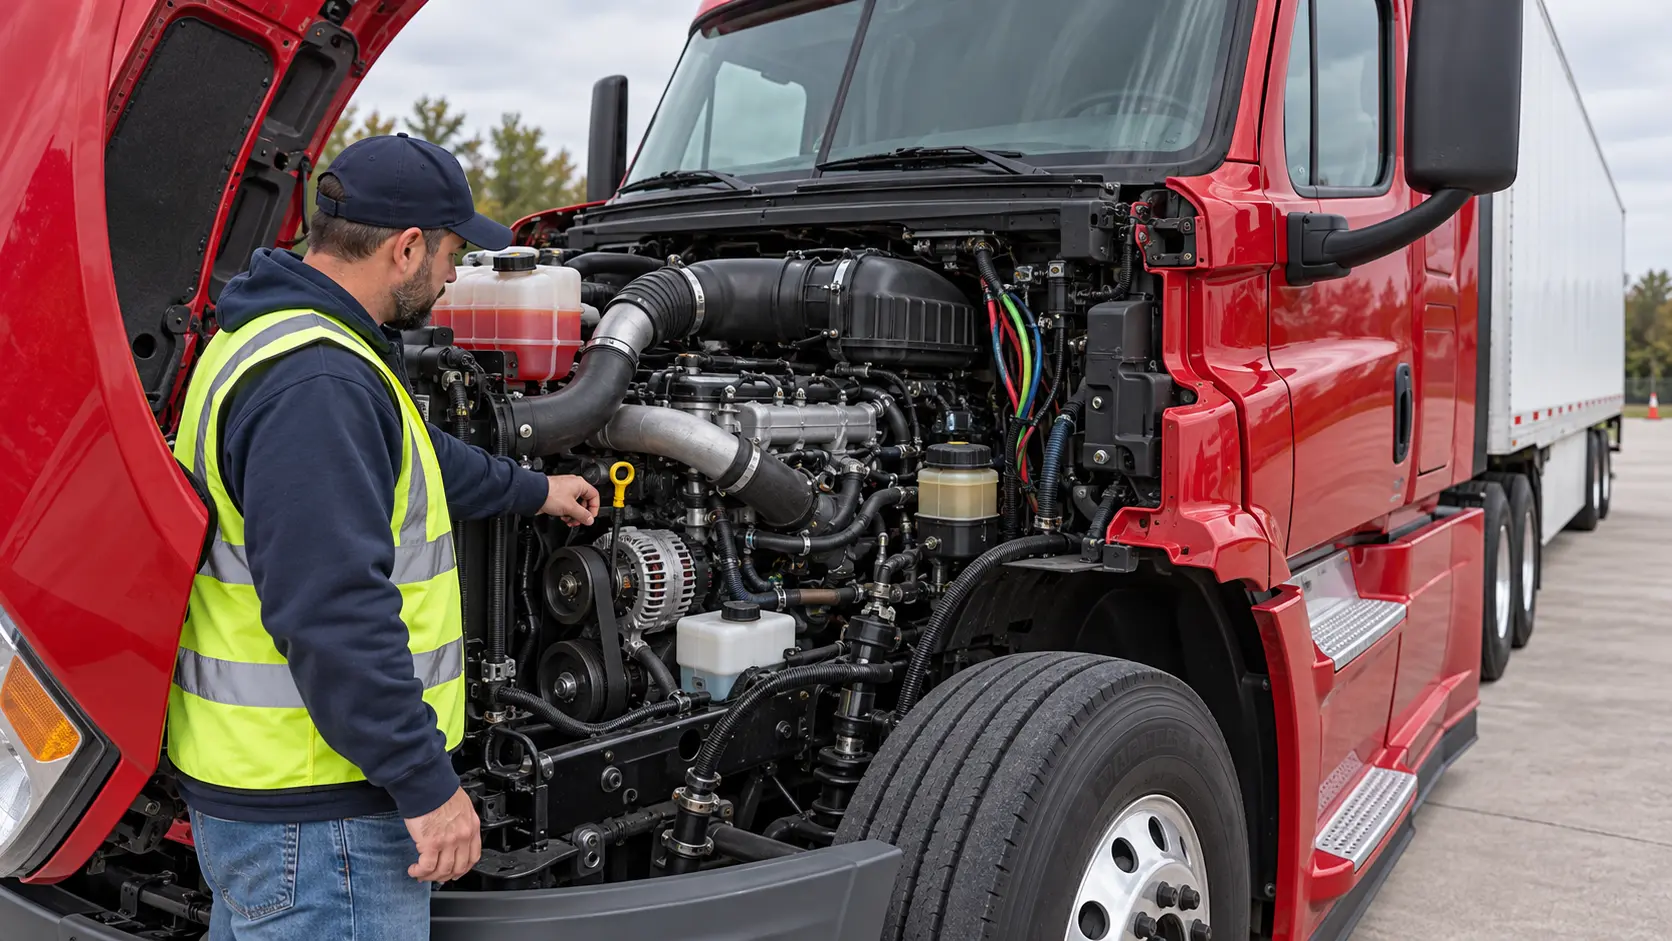
Inspect the installed engine compartment systematically: fluids, reservoirs, belts, hoses, wiring, mounting, and possible leak points.Inspecciona sistemáticamente el compartimiento del motor: fluidos, depósitos, correas, mangueras, cables, montajes y posibles fugas.
Engine off unless the manufacturer requires otherwise
Open and secure the hood. Stay clear of fans, belts, hot surfaces, and pressurized systems. Never open a hot radiator cap.
Check engine oil, coolant, and power-steering fluid using the manufacturer’s procedure and acceptable ranges.
Inspect belts for proper tension, fraying, glazing, cracks, and contamination; inspect hoses for cuts, bulges, rubbing, leaks, and secure clamps.
Check components and reservoirs for secure mounting; inspect wiring and air lines for chafing, heat damage, loose connectors, or leaks.
Look below the engine and around seals, pumps, and lines for fresh leakage.
Stop: A serious fluid leak, dangerously low fluid, damaged belt, exposed wiring, or unsecured component requires reporting and correction before driving.
Motor apagado, salvo que el fabricante indique otra cosa
Abre y asegura el capó. Mantente lejos de ventiladores, correas, superficies calientes y sistemas presurizados. Nunca abras la tapa caliente del radiador.
Revisa engine oil, coolant y power-steering fluid según el procedimiento y los rangos del fabricante.
Revisa las correas por tensión correcta, desgaste, brillo, grietas y contaminación; revisa mangueras por cortes, abultamientos, roce, fugas y abrazaderas seguras.
Comprueba que componentes y depósitos estén firmes; busca cables y líneas de aire rozados, quemados, desconectados o con fuga.
Busca fugas frescas debajo del motor y alrededor de sellos, bombas y líneas.
Detente: Una fuga seria, nivel peligrosamente bajo, correa dañada, cable expuesto o componente suelto debe reportarse y corregirse antes de conducir.
04
Front axleEje delantero
Inspect steering and front suspension
Inspecciona la dirección y suspensión delantera
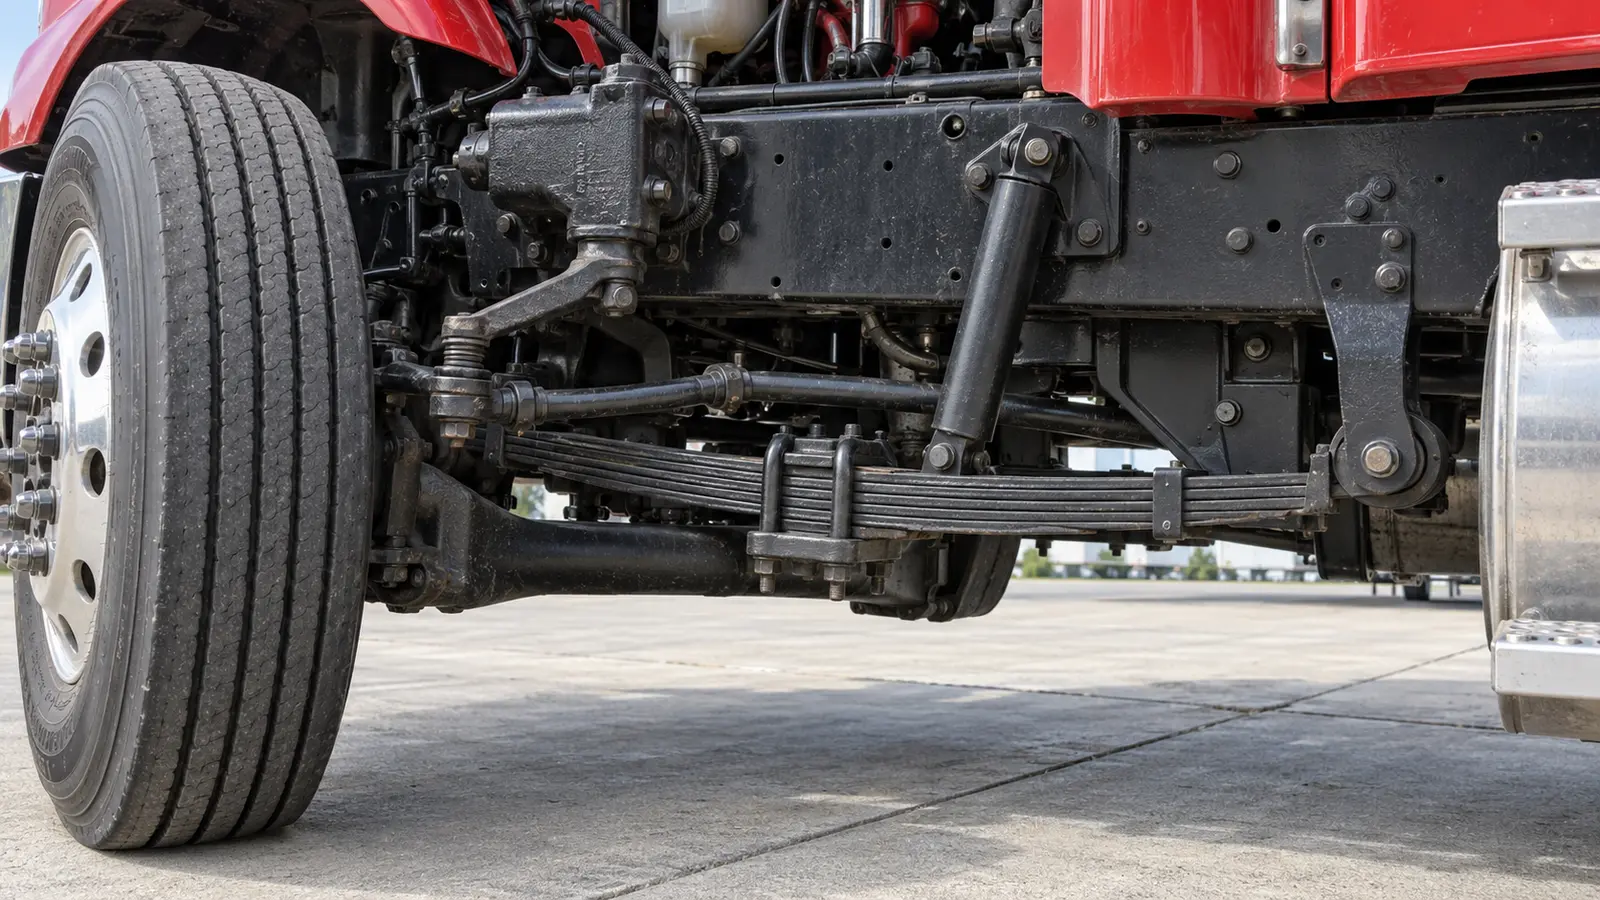
Follow the steering and suspension force path through the visible shaft, linkage, axle, springs, shock, hangers, and U-bolts.Sigue la trayectoria de la dirección y suspensión por el eje, varillaje, muelles, amortiguador, soportes y U-bolts visibles.
Follow the force path
Check the steering box and steering shaft for secure mounting, leaks, damage, and missing hardware.
Inspect the pitman arm, drag link, steering knuckle, and tie rod. Castle nuts and cotter pins must be present where designed; joints should not show obvious looseness.
Inspect the front axle for cracks, bends, illegal welds, or obvious misalignment.
Check springs or air suspension, spring hangers, shackles, shocks, torque arms, and U-bolts for damage, shifting, looseness, or missing parts.
Stop: A loose steering component, missing retaining hardware, cracked axle, displaced spring, or broken U-bolt is a critical safety concern.
Sigue la trayectoria de la fuerza
Revisa el steering box y el steering shaft por montaje firme, fugas, daños y tornillería faltante.
Inspecciona pitman arm, drag link, steering knuckle y tie rod. Las castle nuts y cotter pins deben estar presentes donde corresponda; las juntas no deben mostrar holgura evidente.
Revisa el eje delantero por grietas, dobleces, soldaduras no permitidas o desalineación evidente.
Revisa muelles o bolsas de aire, spring hangers, shackles, shocks, torque arms y U-bolts por daño, desplazamiento, holgura o piezas faltantes.
Detente: Dirección suelta, retención faltante, eje agrietado, muelle desplazado o U-bolt roto es un problema crítico.
05
Every wheel positionCada posición de rueda
Inspect brakes, tires, wheels, and hubs
Inspecciona frenos, llantas, rines y mazas
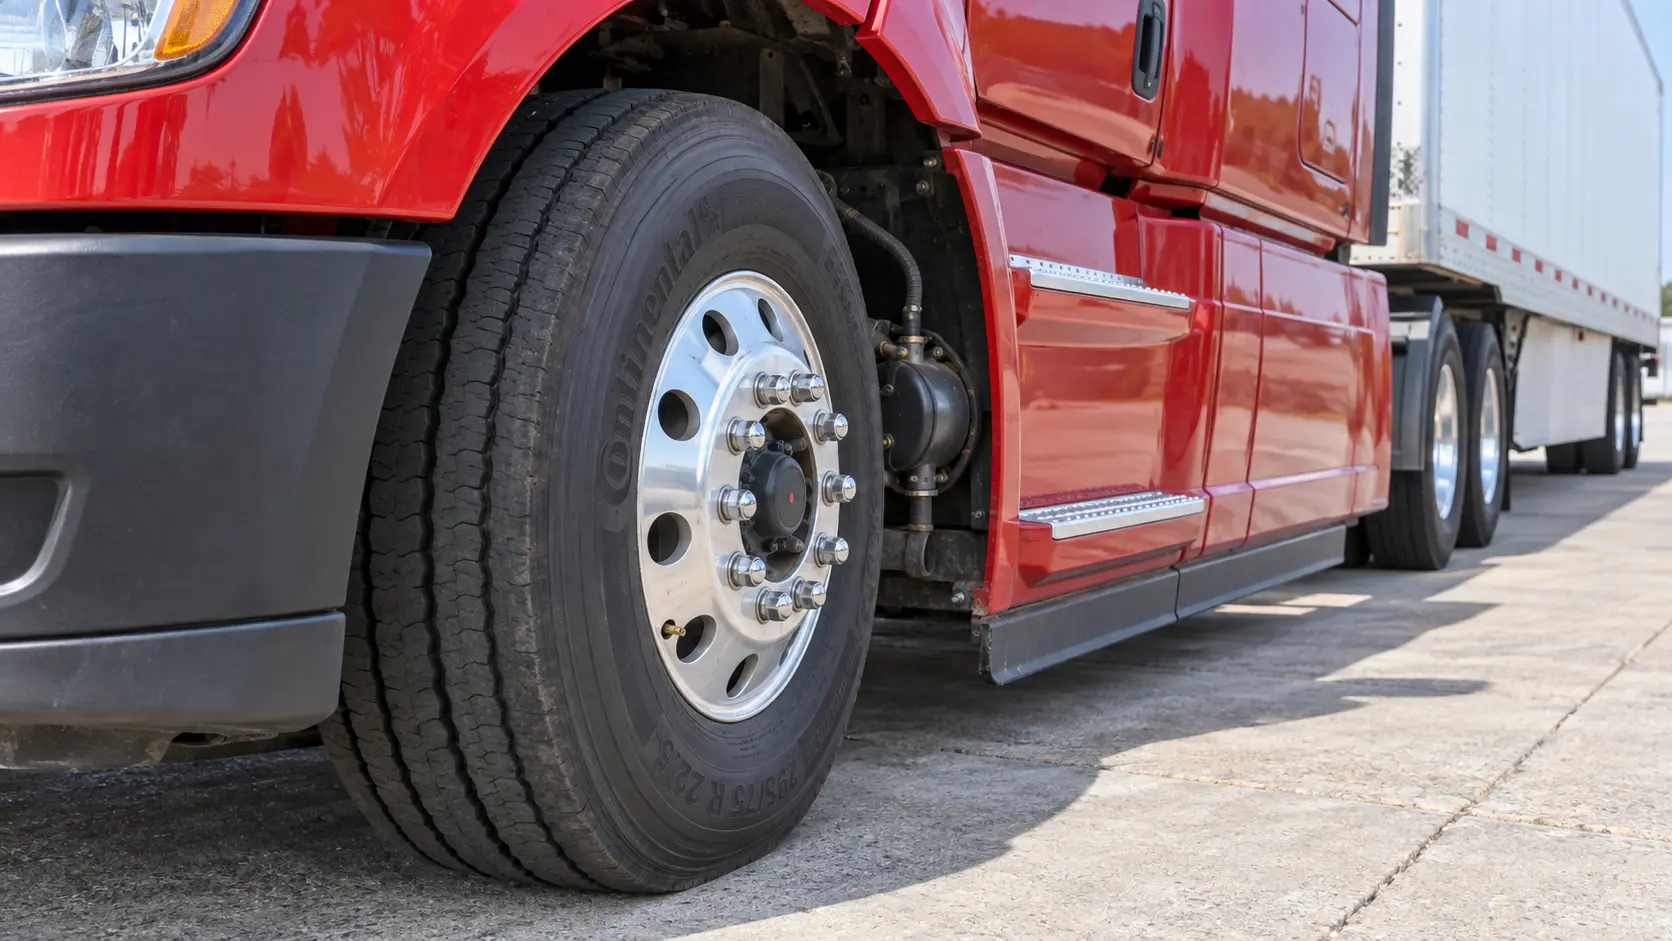
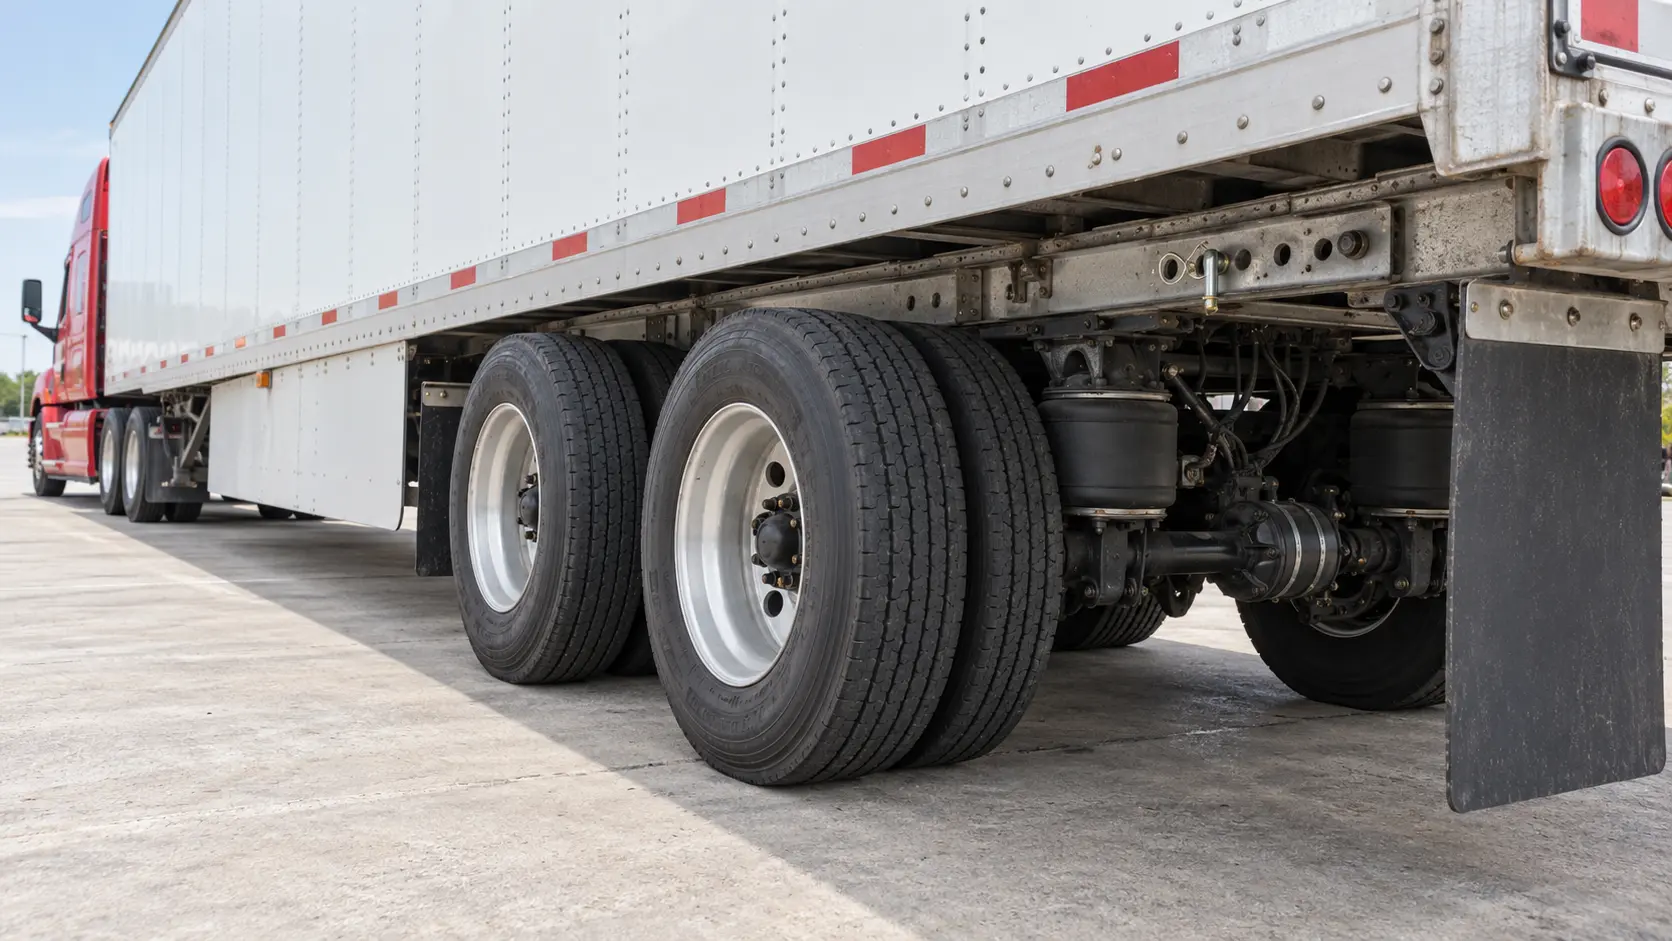
Inspect the mounted tire and wheel in normal road-ready configuration, then look behind the wheel for the brake chamber, hoses, lines, and foundation-brake components visible during a driver pre-trip.Usa esta vista de capacitación para comprender la cámara y líneas, freno, maza, espárragos, rueda y áreas de inspección de la llanta.
Repeat this check at every axle
Inspect brake hoses and lines for cuts, rubbing, leaks, and secure connections. Check chambers, clamps, pushrods, slack adjusters, drums or rotors, and visible linings for damage, contamination, and secure mounting.
Do not rely on hand-adjusting automatic slack adjusters. Excessive travel or an adjustment problem requires qualified service under the carrier’s procedure.
Check tire inflation with a gauge when possible; inspect tread, sidewalls, valve stems, cuts, bulges, exposed cord, objects, and mismatched or contacting duals.
Federal minimum tread depth is 4/32 inch on steering-axle tires and 2/32 inch on other tires, measured in a major groove. Company limits may be stricter.
Inspect rims for cracks or bends; lug nuts for looseness, rust trails, shiny threads, or missing hardware; and hubs for leaks, proper oil level where visible, and secure caps.
Stop: Audible air leak, damaged brake hardware, oil-contaminated lining, flat or damaged tire, exposed cord, cracked rim, loose wheel, or leaking hub requires immediate evaluation.
Repite esta revisión en cada eje
Revisa brake hoses y lines por cortes, roce, fugas y conexiones firmes. Revisa chambers, clamps, pushrods, slack adjusters, drums o rotors y linings visibles por daño, contaminación y montaje seguro.
No dependas de ajustar manualmente un automatic slack adjuster. Recorrido excesivo o un problema de ajuste requiere servicio calificado según el transportista.
Mide la presión con gauge cuando sea posible; revisa tread, sidewalls, valve stems, cortes, abultamientos, cordones expuestos, objetos y llantas duales que se toquen o no correspondan.
El mínimo federal de tread es 4/32 de pulgada en llantas del steering axle y 2/32 en las demás, medido en un surco principal. La compañía puede exigir más.
Revisa rims por grietas o dobleces; lug nuts por holgura, líneas de óxido, roscas brillantes o piezas faltantes; y hubs por fugas, nivel visible y tapas seguras.
Detente: Fuga de aire, freno dañado, lining con aceite, llanta desinflada o dañada, cordón expuesto, rim agrietado, rueda floja o hub con fuga requiere evaluación inmediata.
06
Tractor side and underbodyLado y parte inferior del tractor
Check fuel, exhaust, battery, frame, and driveline
Revisa combustible, escape, batería, chasis y transmisión
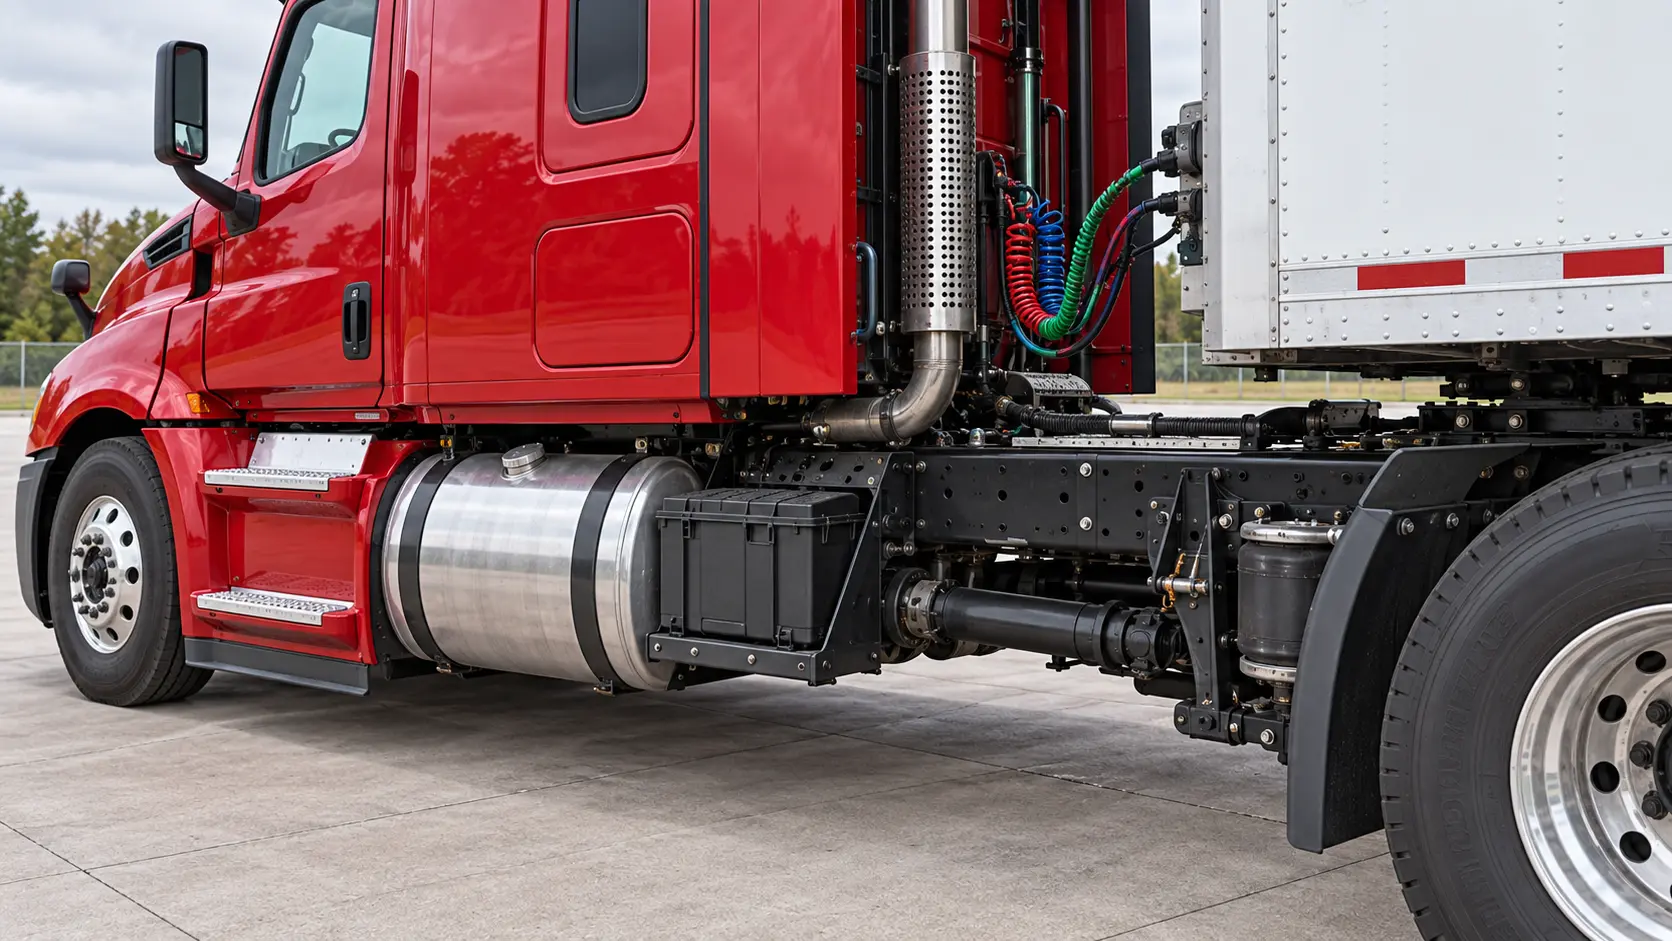
Inspect the driver-side systems as one sequence: tank and cap, steps, battery box, exhaust, frame, driveline, suspension, and secured lines.Inspecciona los sistemas del lado del conductor como una secuencia: tanque y tapa, escalones, baterías, escape, chasis, transmisión, suspensión y líneas.
Inspect from a safe standing or crouched position
Check fuel and DEF tanks, caps, straps, brackets, and lines for secure mounting, damage, or leakage.
Inspect exhaust mounting, pipes, clamps, shields, soot around leaking seams, and clearance from fuel, wiring, and brake lines.
Check battery box or compartment for secure cover, batteries, cables, and obvious corrosion or damage.
Inspect steps and grab handles before climbing; check cab mounts and mirrors for secure mounting.
Visually inspect frame rails, crossmembers, torque arms, driveshaft, carrier bearing, and U-joints for cracks, bends, missing hardware, or loose parts.
Safety: Do not crawl beneath a vehicle unless it is secured against movement and your employer’s procedure and training specifically authorize it.
Inspecciona desde una posición segura
Revisa tanques de fuel y DEF, caps, straps, brackets y líneas por montaje firme, daño o fugas.
Inspecciona el exhaust, tuberías, clamps, protectores, hollín alrededor de uniones con fuga y separación de combustible, cables y líneas de freno.
Revisa el battery box por tapa segura, baterías, cables y corrosión o daño evidente.
Revisa steps y grab handles antes de subir; comprueba los cab mounts y mirrors.
Observa frame rails, crossmembers, torque arms, driveshaft, carrier bearing y U-joints por grietas, dobleces, tornillos faltantes o piezas sueltas.
Seguridad: No te metas debajo del vehículo salvo que esté asegurado y el procedimiento y entrenamiento del empleador lo autoricen.
07
Coupling areaÁrea de acoplamiento
Verify the fifth wheel, kingpin, jaws, and lines
Verifica fifth wheel, kingpin, jaws y líneas
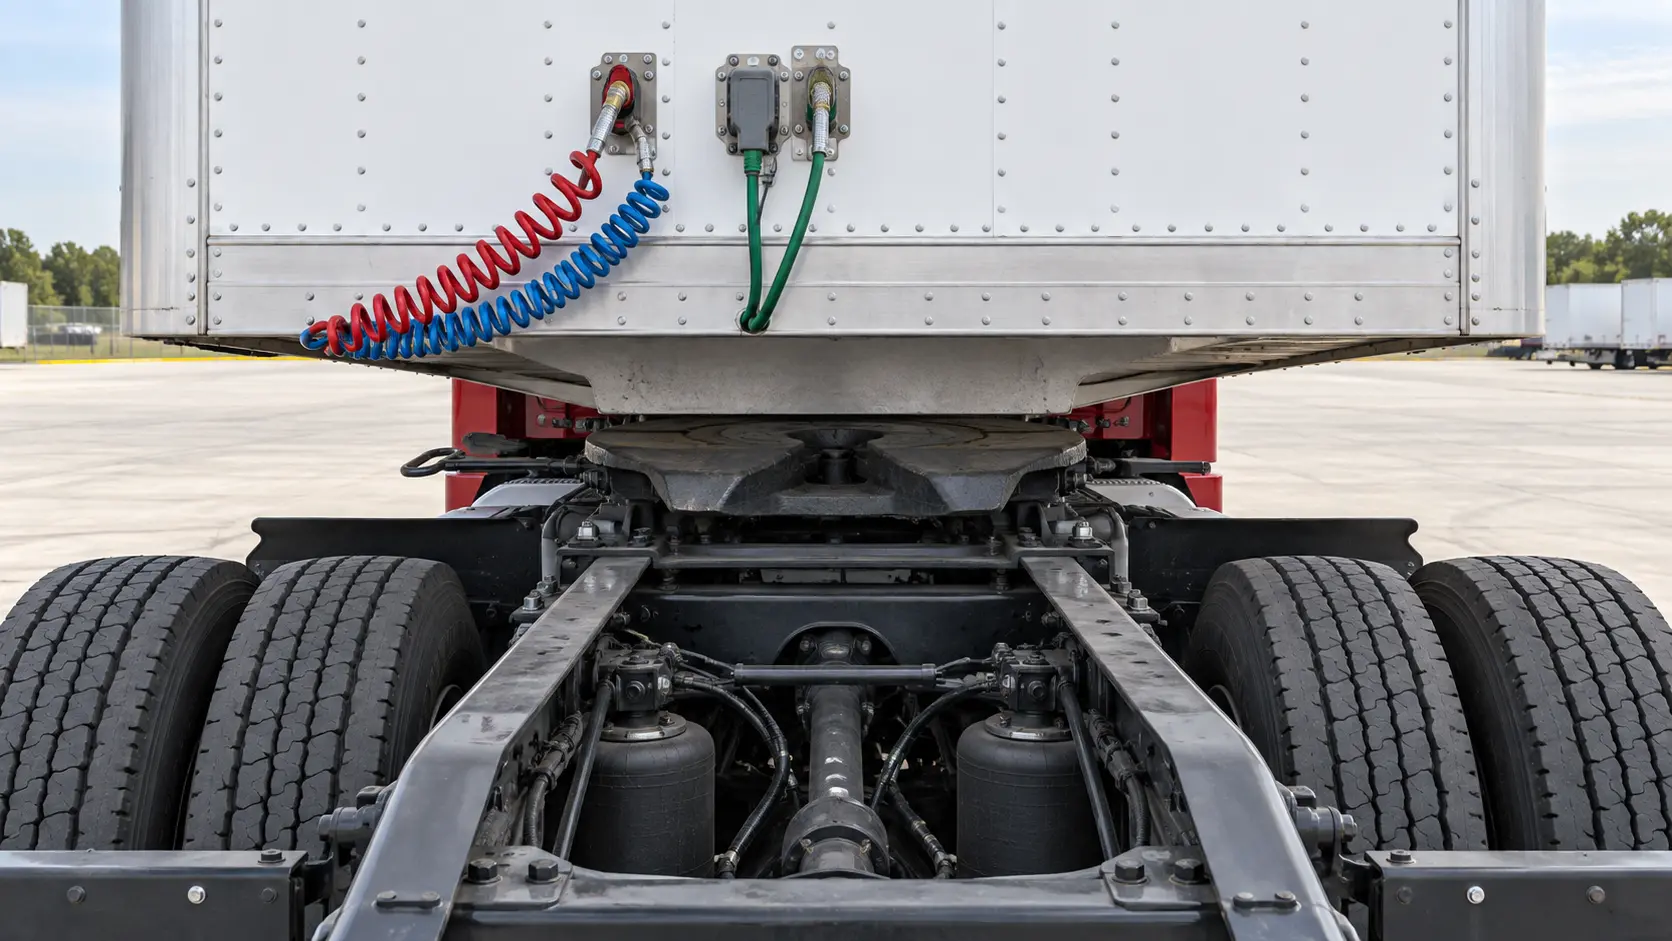
Confirm a complete coupling: fifth wheel and apron contact, locking area, release mechanism, mounting, secured air/electrical lines, and no visible gap.Confirma un acoplamiento completo: contacto entre quinta rueda y plataforma, cierre, liberación, montajes, líneas aseguradas y ausencia de espacio.
Look, touch only when safe, and tug-test correctly
Check air and electrical lines for correct connection, seals, support, enough turning clearance, and no cuts, leaks, tangles, or dragging.
Look for no visible gap between the trailer apron and fifth-wheel plate. Check the apron, fifth wheel, platform, mounting bolts, and supports for cracks, damage, or missing hardware.
From a safe view, confirm the locking jaws are closed around the kingpin shank—not the head.
Confirm the release arm is fully seated and the safety latch is engaged. Sliding fifth-wheel pins or teeth must be fully engaged with stops present.
Verify enough tractor-to-trailer and landing-gear clearance. Perform the employer/manufacturer tug-test procedure with the trailer brakes applied.
Stop: A visible gap, jaws not locked around the shank, unsecured release handle, cracked plate, missing mounting hardware, or damaged line makes the coupling unsafe.
Observa, toca solo cuando sea seguro y haz el tug test correctamente
Revisa air y electrical lines por conexión correcta, seals, soporte, espacio para girar y ausencia de cortes, fugas, enredos o roce con el piso.
No debe haber espacio visible entre el trailer apron y la fifth-wheel plate. Revisa apron, fifth wheel, platform, tornillos y soportes por grietas, daño o piezas faltantes.
Desde un lugar seguro, confirma que las locking jaws rodean el vástago del kingpin, no la cabeza.
Confirma que release arm esté asentado y safety latch enganchado. Los pins o teeth de la sliding fifth wheel deben estar completamente trabados y con topes.
Verifica espacio entre tractor, trailer y landing gear. Realiza el tug test del empleador/fabricante con los frenos del remolque aplicados.
Detente: Espacio visible, jaws mal cerradas, release handle sin asegurar, placa agrietada, tornillos faltantes o línea dañada hacen inseguro el acoplamiento.
08
Trailer front and sidesFrente y lados del remolque
Inspect landing gear, frame, body, and cargo securement
Inspecciona landing gear, chasis, carrocería y carga
Inspect the trailer front and side: header, connections, raised landing gear, secured crank, frame, crossmembers, body, side lights, and reflective tape.Inspecciona el frente y lado del remolque: panel frontal, conexiones, landing gear levantado, manivela segura, chasis, travesaños, carrocería, luces y cinta reflectante.
Move down one side, then return on the other
Check the trailer header, roof, sidewalls, posts, rails, floor area, frame, and crossmembers for holes, cracks, buckling, sagging, corrosion, loose fasteners, or damage.
Verify landing gear is fully raised, both legs and pads are intact, the crank is secured, and the frame has turning clearance.
Check cargo, doors, gates, tarps, chains, straps, binders, blocking, bracing, and anchor points as applicable. Confirm proper distribution and securement for the load.
Check conspicuity tape, reflectors, marker lamps, placards, and required markings for condition and visibility.
For sliding tandems, inspect air hoses and wiring for proper suspension and clearance throughout the slider range.
En route: Cargo securement generally must be rechecked within the first 50 miles and at the intervals or duty-status changes required by 49 CFR 392.9, unless an exception applies.
Avanza por un lado y regresa por el otro
Revisa header, roof, sidewalls, posts, rails, piso, frame y crossmembers por huecos, grietas, pandeo, hundimiento, corrosión, sujetadores flojos o daño.
Verifica que landing gear esté completamente levantado, patas y pads enteros, crank asegurado y espacio para girar.
Revisa carga, doors, gates, tarps, chains, straps, binders, blocking, bracing y anchor points según corresponda. Confirma distribución y sujeción correctas.
Revisa conspicuity tape, reflectors, marker lamps, placards y marcas requeridas por condición y visibilidad.
En sliding tandems, revisa que mangueras de aire y cables estén suspendidos y tengan espacio durante todo el recorrido.
En ruta: La carga generalmente debe revisarse dentro de las primeras 50 millas y en los intervalos o cambios de estado exigidos por 49 CFR 392.9, salvo excepciones.
09
Trailer tandem and rearTándem y parte trasera
Repeat the running-gear checks and secure the rear
Repite la revisión mecánica y asegura la parte trasera
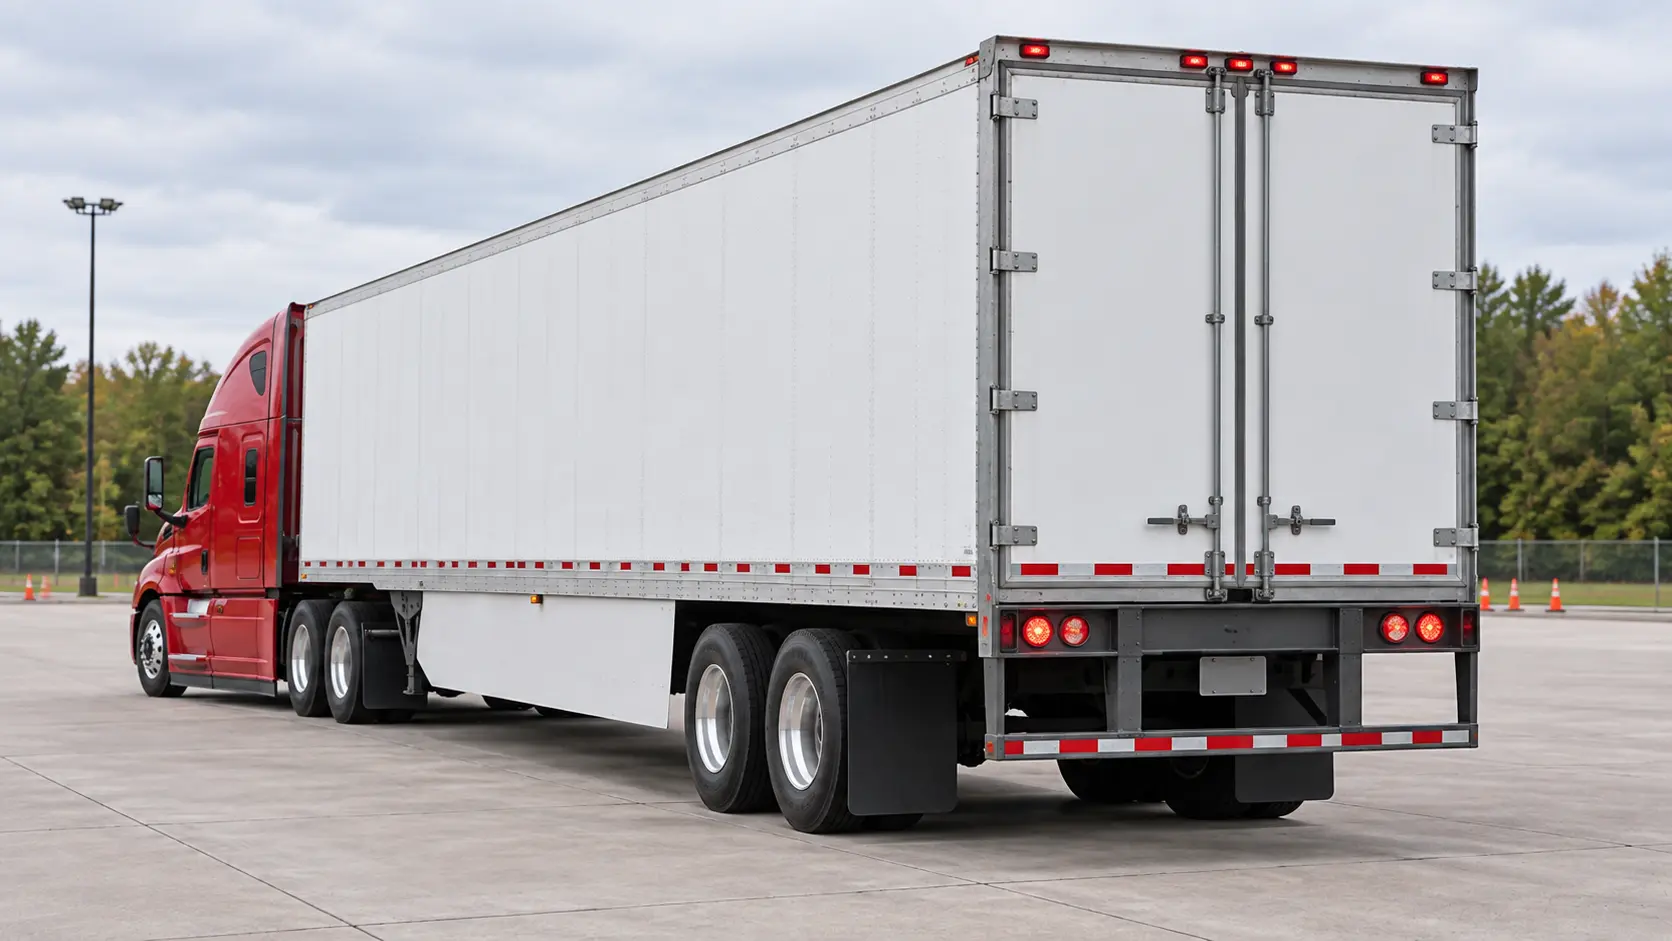
Inspect the two-axle tandem as a complete system: slider rail and pins, suspension, brakes and lines, tires, wheels, hubs, spacing, and mudflaps.Inspecciona el tándem de dos ejes como sistema completo: riel y pasadores, suspensión, frenos y líneas, llantas, ruedas, mazas, separación y guardafangos.
Do not assume the trailer matches the tractor
Repeat the suspension, brake, wheel, tire, hub, and air-line inspection at every trailer axle.
Confirm all tandem locking pins are fully engaged, the handle is secured, stops are present, and the tandem position is legal for the route.
Check mudflaps, ABS lamp, axle and frame condition, and air-suspension height or spring alignment.
At the rear, inspect doors, hinges, seals, latches, locks, liftgate if equipped, rear lights, reflectors, license plate and lamp, conspicuity tape, and rear-impact guard.
Make sure nothing can fall, swing, leak, or project into traffic.
Stop: Partly engaged slider pins, unsecured doors, damaged rear guard, leaking hub, brake defect, or unsafe tire must be addressed before travel.
No supongas que el remolque está igual que el tractor
Repite la inspección de suspensión, frenos, ruedas, llantas, hubs y líneas de aire en cada eje del remolque.
Confirma que todos los tandem locking pins estén completamente adentro, el handle asegurado, topes presentes y posición legal para la ruta.
Revisa mudflaps, ABS lamp, ejes, frame y altura de air suspension o alineación de muelles.
Atrás, revisa doors, hinges, seals, latches, locks, liftgate si existe, luces, reflectors, placa y luz, conspicuity tape y rear-impact guard.
Nada debe caerse, balancearse, gotear o sobresalir hacia el tráfico.
Detente: Slider pins parcialmente trabados, puertas sin asegurar, rear guard dañado, hub con fuga, defecto de freno o llanta insegura debe corregirse.
10
Exterior lightingIluminación exterior
Test every required light and reflector
Prueba cada luz y reflector requerido
At the trailer rear, verify doors and hardware, required lamps, reflectors, conspicuity tape, license-light area, and rear-impact guard.En la parte trasera verifica puertas y herrajes, luces requeridas, reflectores, cinta reflectante, área de luz de placa y defensa contra impactos.
Check color, operation, mounting, and visibility
Turn on required lamps and four-way flashers. Use a helper, safe reflection, or approved lamp-check system when available.
Test low beams, high beams, front and rear turn signals, hazards, clearance lamps, side markers, tail lamps, brake lamps, reverse lamps if equipped, and the license-plate lamp.
Check lenses for correct color, cracks, missing pieces, dirt or snow, water intrusion, and secure mounting.
Check reflectors and red-and-white conspicuity tape for presence, correct location, cleanliness, and visibility.
Confirm trailer ABS warning-lamp behavior follows the manufacturer’s system check.
Stop: Required lamps that do not operate, show the wrong color, are obscured, or are insecure must be evaluated under applicable law and carrier procedure before departure.
Revisa color, funcionamiento, montaje y visibilidad
Enciende las luces requeridas y four-way flashers. Usa ayudante, reflejo seguro o sistema aprobado cuando esté disponible.
Prueba low beams, high beams, turn signals delanteros y traseros, hazards, clearance lamps, side markers, tail lamps, brake lamps, reverse lamps si existen y license-plate lamp.
Revisa lenses por color correcto, grietas, piezas faltantes, suciedad o nieve, agua adentro y montaje firme.
Revisa reflectors y conspicuity tape rojo y blanco por presencia, ubicación, limpieza y visibilidad.
Confirma que el trailer ABS warning lamp cumpla la revisión del fabricante.
Detente: Luces requeridas que no funcionan, tienen color incorrecto, están tapadas o sueltas deben evaluarse según la ley y el transportista antes de salir.
11
Inside the cabDentro de la cabina
Inspect controls, visibility, seat belt, and emergency gear
Inspecciona controles, visibilidad, cinturón y equipo de emergencia
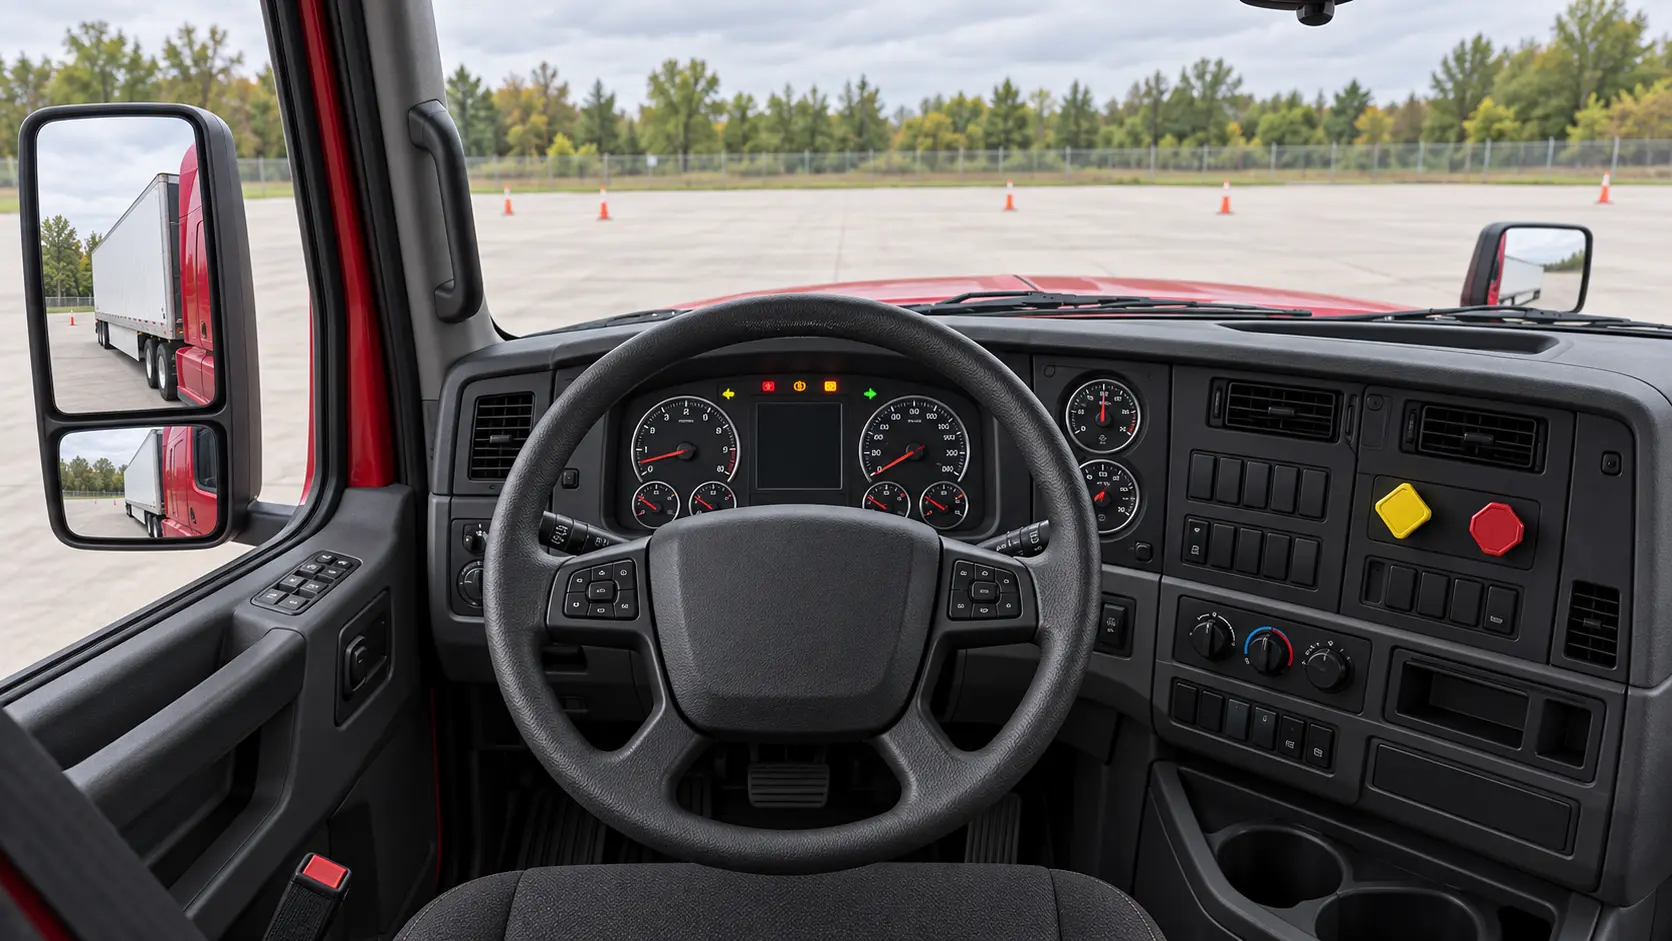
Locate and inspect the driving controls, visibility equipment, gauges and warnings, yellow parking-brake knob, red trailer-air knob, seat belt, and safety equipment.Ubica y revisa controles, equipo de visibilidad, medidores y alertas, perilla amarilla del freno, perilla roja del remolque, cinturón y equipo de seguridad.
Set up before starting
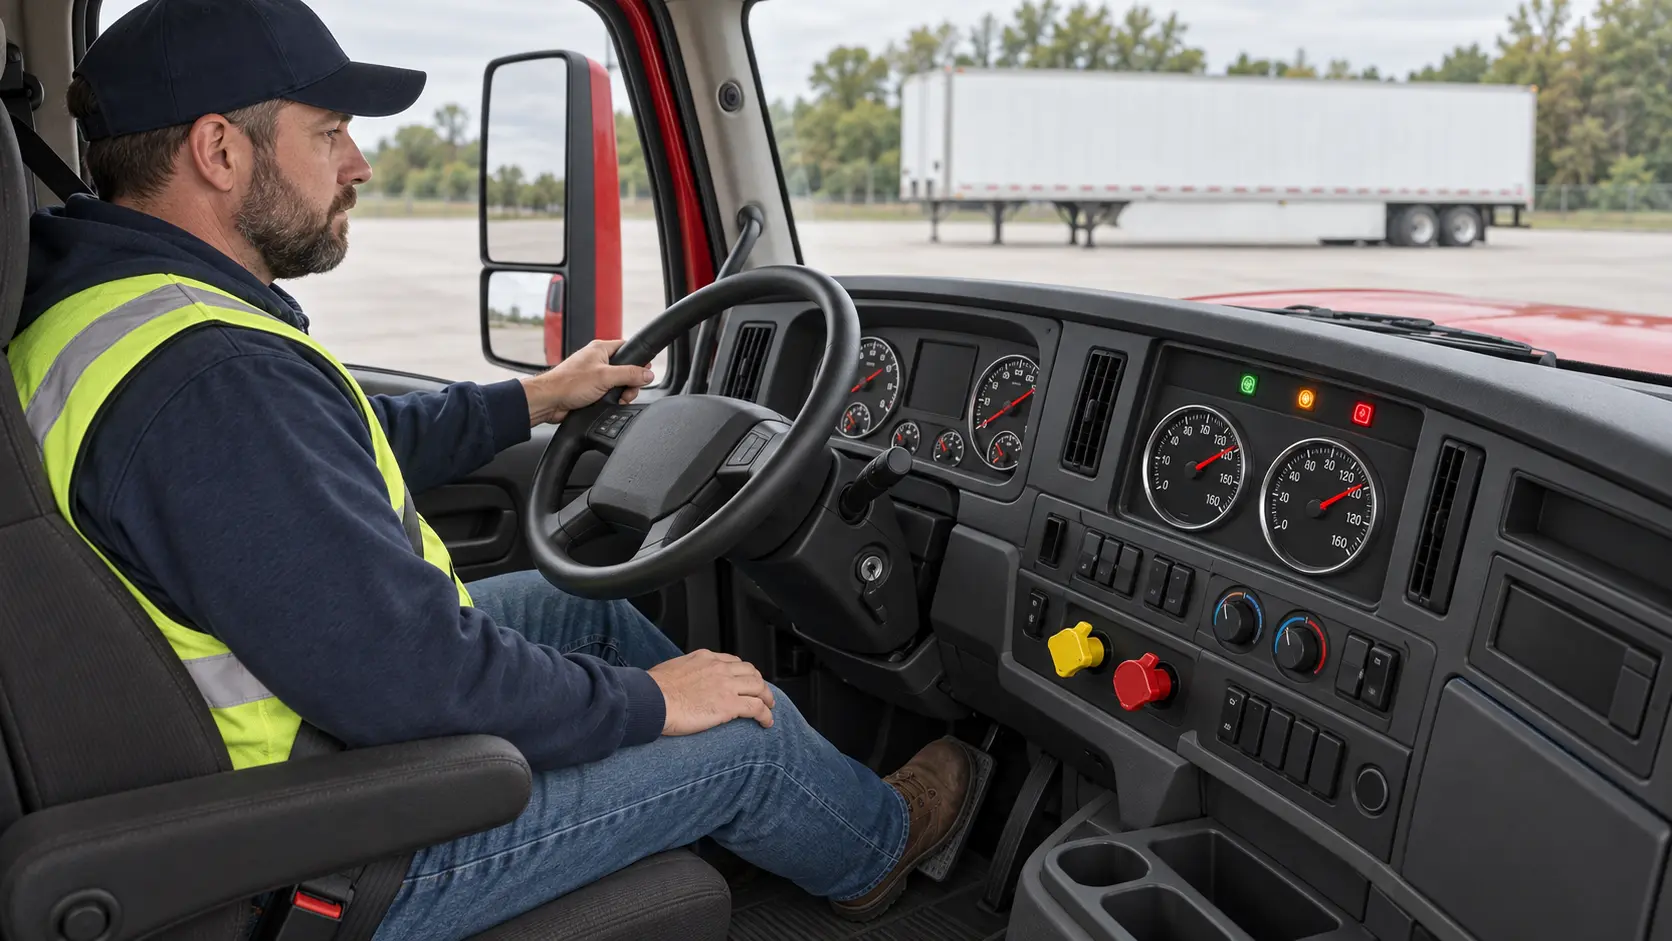
Use three points of contact. Check steps, handholds, floor, and seat mounting; adjust the seat and mirrors before movement.
Inspect the seat belt, windshield, side glass, mirrors, wipers, washers, defroster, heater, and horn.
Confirm steering-wheel adjustment locks, doors latch, windows work as required, and the cab is free of loose objects that can interfere with pedals.
Verify the fire extinguisher is properly rated, charged, secured, and accessible; check three reflective warning triangles and spare fuses when required unless circuit breakers are used.
Start using the manufacturer’s procedure. Observe oil pressure, charging system, coolant temperature, air pressure, ABS and other warning lamps, and listen for unusual sounds.
Stop: Do not move with a defective seat belt, obstructed view, inoperative required wiper, unsafe steering, active critical warning, inadequate air pressure, or missing required emergency equipment.
Prepárate antes de arrancar
Usa tres puntos de contacto. Revisa steps, handholds, piso y montaje del asiento; ajusta asiento y mirrors antes de moverte.
Confirma que el ajuste del steering wheel trabe, puertas cierren, ventanas funcionen y no haya objetos que interfieran con los pedales.
Verifica que fire extinguisher tenga clasificación correcta, carga, sujeción y acceso; revisa tres reflective warning triangles y fuses de repuesto cuando se requieran, salvo circuit breakers.
Arranca según el fabricante. Observa oil pressure, charging system, coolant temperature, air pressure, ABS y otros warning lamps, y escucha sonidos anormales.
Detente: No te muevas con seat belt defectuoso, vista obstruida, wiper requerido inoperante, dirección insegura, advertencia crítica, presión de aire insuficiente o equipo requerido faltante.
12
Functional brake checksPruebas funcionales de frenos
Test the air system, parking brakes, and service brake response
Prueba el sistema de aire, parking brakes y respuesta del service brake
Perform the air-brake sequence only while safely parked: build pressure, leakage, low-air warning, spring-brake activation, tractor protection, and slow response tests.Realiza la secuencia de frenos de aire solo con el camión estacionado: presión, fugas, alarma de aire bajo, activación del freno, protección del tractor y respuesta lenta.
Use the current vehicle and state procedure
Build air pressure to the manufacturer’s normal operating range. Confirm compressor cut-in/cut-out behavior and pressure buildup meet the applicable standard.
With the vehicle secured, perform the prescribed static and applied air-leakage tests. Watch both gauges, listen for leaks, and use the exact time and pressure-loss limits in the current state CDL manual and vehicle procedure.
Fan the service brake to verify the low-air warning activates at the required pressure and the spring brakes apply within the specified range. Do not guess the thresholds.
Verify tractor-protection and trailer emergency functions using the approved procedure. Never create uncontrolled vehicle movement to test them.
In a clear, level area, test trailer, tractor, and combination parking brakes as applicable. Move slowly and apply the service brake firmly; the vehicle should stop without pulling, delay, unusual noise, or weak response.
Complete one final 360-degree scan. Remove chocks, close and latch compartments, secure the hood, confirm clearance, buckle up, document defects, and release the vehicle only when safe.
Do not drive: Air pressure will not build or hold, warning devices fail, spring brakes operate outside required limits, parking brakes do not hold, service brakes pull or respond weakly, or any unresolved defect can affect safe operation.
Usa el procedimiento vigente del vehículo y del estado
Sube la presión al rango normal del fabricante. Confirma que compressor cut-in/cut-out y pressure buildup cumplan el estándar aplicable.
Con el vehículo asegurado, realiza las pruebas static y applied air-leakage indicadas. Observa ambos gauges, escucha fugas y usa exactamente los límites de tiempo y pérdida del manual CDL estatal y del vehículo.
Bombea el service brake para confirmar que low-air warning se active a la presión requerida y spring brakes se apliquen dentro del rango especificado. No adivines los límites.
Verifica tractor-protection y trailer emergency con el procedimiento aprobado. Nunca provoques movimiento sin control.
En área despejada y nivelada, prueba trailer, tractor y combination parking brakes según corresponda. Avanza lentamente y aplica service brake firmemente; debe parar sin jalar, retraso, ruido anormal o respuesta débil.
Haz una última vuelta de 360 grados. Retira calzas, cierra compartimientos, asegura el capó, confirma espacio, abrocha cinturón, documenta defectos y libera el vehículo solo si es seguro.
No conduzcas: Si el aire no sube o no se mantiene, fallan advertencias, spring brakes operan fuera de límites, parking brakes no sostienen, service brakes jalan o están débiles, o existe un defecto que afecta la seguridad.
Official sources and scope
Fuentes oficiales y alcance
This guide combines the federal minimum equipment categories, the driver’s pre-trip duty, Florida’s CDL vehicle-inspection material, and CVSA’s driver-facing roadside inspection reference. It is an educational walkaround—not a periodic annual inspection, mechanic’s diagnosis, roadside enforcement inspection, or substitute for hands-on instruction.
Esta guía combina las categorías federales mínimas, la obligación preoperacional del conductor, el material de inspección CDL de Florida y la referencia para conductores de CVSA. Es una guía educativa; no reemplaza una inspección anual, diagnóstico mecánico, inspección oficial en carretera ni instrucción práctica.